
今日係 2016 Aug.,Google 仲未推出 .NET 版嘅 Firebase Authentication SDK,我又急住要用,唯有試下自己動手,為咗增加難度(我冇得揀 🤗),我要喺 Visual WebGUI 結合 Firebase Authentiction!
網上資源:
- Visual WebGUI 執咗,Community group 又上唔倒位,大概祇能去到 v10.0.5,不過已經好好用。
- Firebase Authentication 喺 Google 之下更多功能,我打算用 Authentication 同 Cloud Messaging。
- Firebase Quickstarts for Javascript 我就係用哩個 sample 做參考。
- FirebaseUI 簡化版,我冇用,不過值得介紹。
- VWG.Firebase.Authentication 今次講題嘅 source code
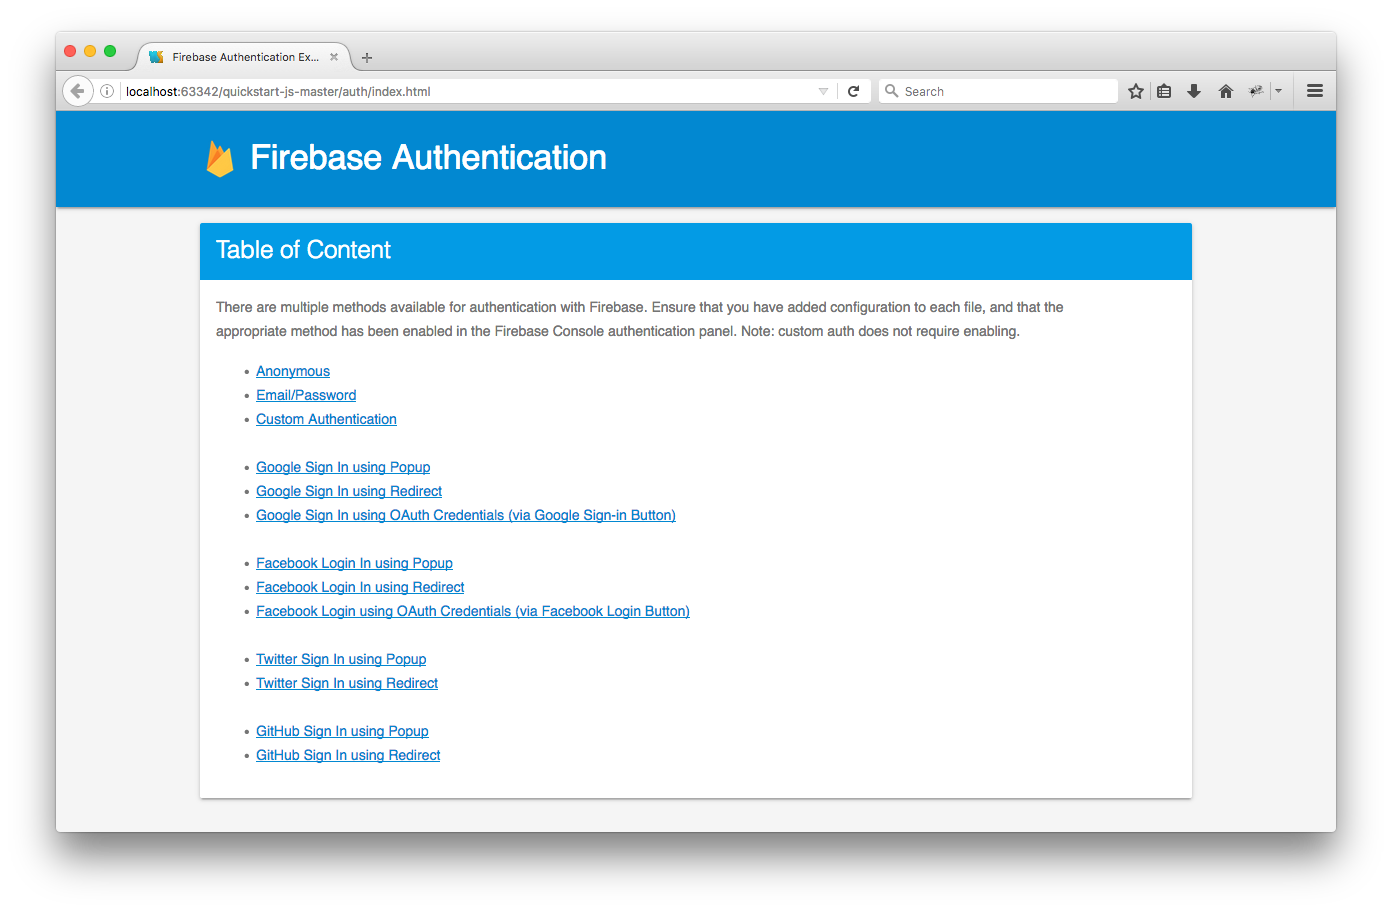
先睇官方提供嘅 sample Quickstarts(置頂嘅圖),我今次會用 Email/Password,Google Sign In using Popup,遲啲先考慮用埋 Facebook Login in using Popup:
 |
 |
 |
| Email/Password 個 UI | Google Sign In using Popup | Google sign in UI |
我哋先嚟睇下 Email/Password 係點樣做嘅,睇 Quickstarts’ source code:
 |
 |
 |
| 左邊,由 index.html 開始,你想用邊種 sign in 方法就選邊種,對應番獨自嘅 html,右邊係 email.html,得幾個 functions,睇字面意思應該明。🤗 | 擴展 toggleSignIn 嚟睇真啲,#58 firebase.auth() .signInWithEmailAndPassword 就係用嚟 authenticate。 |
擴展 handleSignUp,#93 firebase.auth() .createUserWithEmailAndPassword 顧名思意,用嚟喺 Firebase create 一個新 user。 |
Google Sign in using Popup source:
<!DOCTYPE html>
<!--
Copyright (c) 2016 Google Inc.

Licensed under the Apache License, Version 2.0 (the "License");
you may not use this file except in compliance with the License.
You may obtain a copy of the License at

http://www.apache.org/licenses/LICENSE-2.0

Unless required by applicable law or agreed to in writing, software
distributed under the License is distributed on an "AS IS" BASIS,
WITHOUT WARRANTIES OR CONDITIONS OF ANY KIND, either express or implied.
See the License for the specific language governing permissions and
limitations under the License.
-->
<html>
<head>
  <meta charset=utf-8 />
  <meta name="viewport" content="width=device-width, initial-scale=1.0">
  <title>Google Authentication with Popup</title>

  <!-- Material Design Theming -->
  <link rel="stylesheet" href="https://code.getmdl.io/1.1.3/material.orange-indigo.min.css">
  <link rel="stylesheet" href="https://fonts.googleapis.com/icon?family=Material+Icons">
  <script defer src="https://code.getmdl.io/1.1.3/material.min.js"></script>

  <link rel="stylesheet" href="main.css">

  <!-- Firebase -->
  <!-- ***********************************************************************************************************************
       * TODO(DEVELOPER): Paste the initialization snippet from: Firebase Console > Overview > Add Firebase to your web app. *
       *********************************************************************************************************************** -->

  <script type="text/javascript">

    /**
     * Function called when clicking the Login/Logout button.
     */
    // [START buttoncallback]
    function toggleSignIn() {
      if (!firebase.auth().currentUser) {
        // [START createprovider]
        var provider = new firebase.auth.GoogleAuthProvider();
        // [END createprovider]
        // [START addscopes]
        provider.addScope('https://www.googleapis.com/auth/plus.login');
        // [END addscopes]
        // [START signin]
        firebase.auth().signInWithPopup(provider).then(function(result) {
          // This gives you a Google Access Token. You can use it to access the Google API.
          var token = result.credential.accessToken;
          // The signed-in user info.
          var user = result.user;
          // [START_EXCLUDE]
          document.getElementById('quickstart-oauthtoken').textContent = token;
          // [END_EXCLUDE]
        }).catch(function(error) {
          // Handle Errors here.
          var errorCode = error.code;
          var errorMessage = error.message;
          // The email of the user's account used.
          var email = error.email;
          // The firebase.auth.AuthCredential type that was used.
          var credential = error.credential;
          // [START_EXCLUDE]
          if (errorCode === 'auth/account-exists-with-different-credential') {
            alert('You have already signed up with a different auth provider for that email.');
            // If you are using multiple auth providers on your app you should handle linking
            // the user's accounts here.
          } else {
            console.error(error);
          }
          // [END_EXCLUDE]
        });
        // [END signin]
      } else {
        // [START signout]
        firebase.auth().signOut();
        // [END signout]
      }
      // [START_EXCLUDE]
      document.getElementById('quickstart-sign-in').disabled = true;
      // [END_EXCLUDE]
    }
    // [END buttoncallback]

    /**
     * initApp handles setting up the Firebase context and registering
     * callbacks for the auth status.
     *
     * The core initialization is in firebase.App - this is the glue class
     * which stores configuration. We provide an app name here to allow
     * distinguishing multiple app instances.
     *
     * This method also registers a listener with firebase.auth().onAuthStateChanged.
     * This listener is called when the user is signed in or out, and that
     * is where we update the UI.
     *
     * When signed in, we also authenticate to the Firebase Realtime Database.
     */
    function initApp() {
      // Listening for auth state changes.
      // [START authstatelistener]
      firebase.auth().onAuthStateChanged(function(user) {
        if (user) {
          // User is signed in.
          var displayName = user.displayName;
          var email = user.email;
          var emailVerified = user.emailVerified;
          var photoURL = user.photoURL;
          var isAnonymous = user.isAnonymous;
          var uid = user.uid;
          var refreshToken = user.refreshToken;
          var providerData = user.providerData;
          // [START_EXCLUDE]
          document.getElementById('quickstart-sign-in-status').textContent = 'Signed in';
          document.getElementById('quickstart-sign-in').textContent = 'Sign out';
          document.getElementById('quickstart-account-details').textContent = JSON.stringify({
            displayName: displayName,
            email: email,
            emailVerified: emailVerified,
            photoURL: photoURL,
            isAnonymous: isAnonymous,
            uid: uid,
            refreshToken: refreshToken,
            providerData: providerData
          }, null, '  ');
          // [END_EXCLUDE]
        } else {
          // User is signed out.
          // [START_EXCLUDE]
          document.getElementById('quickstart-sign-in-status').textContent = 'Signed out';
          document.getElementById('quickstart-sign-in').textContent = 'Sign in with Google';
          document.getElementById('quickstart-account-details').textContent = 'null';
          document.getElementById('quickstart-oauthtoken').textContent = 'null';
          // [END_EXCLUDE]
        }
        // [START_EXCLUDE]
        document.getElementById('quickstart-sign-in').disabled = false;
        // [END_EXCLUDE]
      });
      // [END authstatelistener]

      document.getElementById('quickstart-sign-in').addEventListener('click', toggleSignIn, false);
    }

    window.onload = function() {
      initApp();
    };
  </script>
</head>
<body>
<div class="demo-layout mdl-layout mdl-js-layout mdl-layout--fixed-header">

  <!-- Header section containing title -->
  <header class="mdl-layout__header mdl-color-text--white mdl-color--light-blue-700">
    <div class="mdl-cell mdl-cell--12-col mdl-cell--12-col-tablet mdl-grid">
      <div class="mdl-layout__header-row mdl-cell mdl-cell--12-col mdl-cell--12-col-tablet mdl-cell--8-col-desktop">
        <a href="/"><h3>Firebase Authentication</h3></a>
      </div>
    </div>
  </header>

  <main class="mdl-layout__content mdl-color--grey-100">
    <div class="mdl-cell mdl-cell--12-col mdl-cell--12-col-tablet mdl-grid">

      <!-- Container for the demo -->
      <div class="mdl-card mdl-shadow--2dp mdl-cell mdl-cell--12-col mdl-cell--12-col-tablet mdl-cell--12-col-desktop">
        <div class="mdl-card__title mdl-color--light-blue-600 mdl-color-text--white">
          <h2 class="mdl-card__title-text">Google Authentication with Popup</h2>
        </div>
        <div class="mdl-card__supporting-text mdl-color-text--grey-600">
          <p>Sign in with your Google account below.</p>

          <!-- Button that handles sign-in/sign-out -->
          <button disabled class="mdl-button mdl-js-button mdl-button--raised" id="quickstart-sign-in">Sign in with Google</button>

          <!-- Container where we'll display the user details -->
          <div class="quickstart-user-details-container">
            Firebase sign-in status: <span id="quickstart-sign-in-status">Unknown</span>
            <div>Firebase auth <code>currentUser</code> object value:</div>
            <pre><code id="quickstart-account-details">null</code></pre>
            <div>Google OAuth Access Token:</div>
            <pre><code id="quickstart-oauthtoken">null</code></pre>
          </div>
        </div>
      </div>
    </div>
  </main>
</div>
</body>
</html>
都係唔不多,所以 … 好容易搞,祇要加上 Firebase 提供俾你個 Firebase account 嘅專用 Snippet,然後你想做咩就 call 相應嘅 JavaScript function 就掂,難嘅就係 authenticate 完之後點樣可以 callback 你個 application?
我吔嚟睇下我個 VWG project:

我將佢寫成 Custom Control(project VWG.Firebase),用 project VWG.Firebase.WebAuthTest 做測試。先由 WebAuthTest 開始,得兩個 forms:
- Desktop
係 startup page,吉嘅,user 一定要 login 咗先會顯示,如果未 login 就會 transfer 去 Signin form。 - Signin
Inherit Visual WebGUI 嘅 build-in component LogonForm,根據 Gizmox 自己講,佢係高度 secured,未 logon 嘅 users 就會嚟哂哩度,logon 咗就會 transfer 去指定嘅 form,我一直都係用佢,今次加埋 Firebase authentication。
好,睇圖:
 |
 |
 |
| Desktop form,咩都冇加,一遍空白。 | Signin form,加咗幾個 controls,user 可以輸入 user name 同 password,然後 click Sign In(紅色 button),或者用 Google/Facebook sign-in。留意頭頂有個 panel,依家冇放 control,我會喺 form laod 加個 VWG.Firebase.Authentication。 | 仲有幾個 icons,就係咁多,夠哂簡潔!😜 |
 |
 |
 |
| Debug run 嚟睇下 | 先試 user name 加 password | 成功 logon,個 index tab 顯示由 Signin 變成 Desktop。 |
 |
 |
|
| 用 Google 就會彈出 Google 嘅sign in 畫面,sign in 完就會返番去個 app,然後 server 確認咗就 transfer 去 Desktop。 | 如果你已經 sign in 咗 Google,個 popup 照樣出現,不過閃咗幾嘢就自動關咗,我 capture 唔倒個畫面,我部機太快!🤓 | 我哋嚟睇下 Signin 啲 code,非常簡單,button click events 同 textbox Enter key events. |
 |
 |
 |
| Signin_Load call LoadAuthControl 加個 VWG.Firebase.Authentication,而 Auth_OnSignInResult 就係 callback server side 確認收貨區。 | DoSignInWithEmail 會做少少 input verify 然後就將啲 authentication 交俾 Firebase 負責,自己就等 callback。 | Google sign in 就更加簡單,咩前期功夫都唔使搞。 |
 |
 |
 |
| callback 有咩 sign in data?加個 break point 去睇睇。 | 我用 Google sign in,主要係睇 local variables “auth”。 | 5 個 properties,都係 Fbxxxxxx。 |
 |
 |
 |
| FbUser 等同 Firebase attribute firebase.User,去睇官網嘅解釋。 | FbUserInfo 同 User.ProviderData 好似係相同嘅,去睇官網 firebase.UserInfo。 | FbCredential 用 Google 或者 Facebook sign in 先會有資料,詳細解釋去官網睇 firebase.auth.GoogleAuthProvider。 |
其實已經可以收工,因為如果喺你個 app 應用 Firebase authentication 仲有好多嘢要跟進,無謂花太多時間去了解隻 Custom Control 背後嘅 logics,不過我自己都未 extreme tested 過隻 Custom Control,相信好大機會要修改,知道下一定會有幫助,例如真係要用 Facebook sign in,又或者要用 Twitter sign in 都未定?
花多少少時間講下隻 Custom Control:
 |
 |
 |
| 隻 project 要用到 Newtonsoft.Json 自己去 Nuget 下載。 | AuthenticationSkin.WebAuth.html 係抄 Quickstarts,#30 係 load embedded 嘅 custom JavaScript。 | AuthenticationSkin.WebAuth.js 就比較重要,一切 client side 嘅 functions 都喺哂哩度。 |
// Initialize Firebase
var fb_apiKey = getParameterByName("apiKey");
var fb_authDomain = getParameterByName("authDomain");
var fb_dbURL = getParameterByName("dbURL");
var fb_storage = getParameterByName("storage");

var config = {
 apiKey: fb_apiKey,
 authDomain: fb_authDomain,
 databaseURL: fb_dbURL,
 storageBucket: fb_storage,
};
firebase.initializeApp(config);
哩幾句會喺 page loaded 之後就執行,Firebase 指定動作,我利用 QueryString 將 Firebase 要嘅有關你隻 app 嘅個人訊息讀入,咁樣安排就唔使 hardcode 啲相關資料,可以喺 runtime 才提供。
function signInWithEmail(vwg_FormId, vwg_Email, vwg_Password) {
 firebase.auth().signInWithEmailAndPassword(vwg_Email, vwg_Password).then(function (result) {
   var jsonAuth = JSON.stringify(result);
   // callback to VWG server
   if (typeof (VWG) == 'undefined' || VWG == null || VWG.Events == null) return;
   var eventType = "signInWithEmail";
   var objEvent = VWG.Events.CreateEvent(vwg_FormId, eventType);
   VWG.Events.SetEventAttribute(objEvent, 'Value', jsonAuth);
   VWG.Events.RaiseEvents();
 }).catch(function (error) {
   signInFailed(vwg_FormId);
 })
}
function signInWithEmail 會 call firebase.js 嘅 firebase.auth().signInWithEmailAndPassword,firebase authentication 搞掂嘅話,佢就將啲 logon 資料化成 Json String,再 call Visual WebGUI client function 嚟 postback to server,server side 就可以喺 FireEvent 接收啲 logon 資料。
最後,我哋去睇 Authentication.cs:

public partial class Authentication : HtmlBox

public class FirebaseProviderData

public class FirebaseUser

public class FirebaseCredential

public enum FirebaseSignInMode
5 個 classes:
- class Authentication
係主菜 - class FirebaseProviderData
class FirebaseUser
class FirebaseCredential
三個都係 auth data,係想將 Firebase auth 訊息提供俾你個 app 用 - enum FirebaseSignInMode
係由你個 app 提供,講明你想用邊種 sign in 方式去做 auth
去主菜睇下點樣將 AuthenticationSkin.WebAuth.html 同 AuthenticationSkin.WebAuth.js 結合:
#region Hiding HtmlBox properties
// Prevent design time serialization and setting of certain HtmlBox properties that could interfere
// with XonomyBox's rendering.
// 照抄 CKEditor
[DesignerSerializationVisibility(DesignerSerializationVisibility.Hidden)]
public override string Html { get { return ""; } }
[DesignerSerializationVisibility(DesignerSerializationVisibility.Hidden)]
public bool IsWindowless { get { return false; } }
[DesignerSerializationVisibility(DesignerSerializationVisibility.Hidden)]
public override string Url { get { return ""; } }
[DesignerSerializationVisibility(DesignerSerializationVisibility.Hidden)]
public override string Path { get { return ""; } }
[DesignerSerializationVisibility(DesignerSerializationVisibility.Hidden)]
public override Gizmox.WebGUI.Common.Resources.ResourceHandle Resource { get { return null; } }
[DesignerSerializationVisibility(DesignerSerializationVisibility.Hidden)]
public HtmlBoxType Type { get { return HtmlBoxType.HTML; } }
[DesignerSerializationVisibility(DesignerSerializationVisibility.Hidden)]
public string ContentType { get { return "text/html"; } }
/// &amp;amp;lt;summary&amp;amp;gt;
/// 直接 inject 啲 html page + Query Strings,原本唔想用 Query Strings,不過掂搞都用唔倒 client side javascript Data_GetAttribute
/// &amp;amp;lt;/summary&amp;amp;gt;
protected override string Source
{
get
{
AuthenticationSkin fbauthSkin = this.Skin as AuthenticationSkin;
if (fbauthSkin != null)
{
// 將 AuthenticationSkin 入面嘅 WebAuth.html 轉換為 VWG 式 http url link
String src = (new SkinResourceHandle(typeof(VWG.Firebase.AuthenticationSkin), "WebAuth.html")).ToString();
// 讀取 web.config 入面嘅 Firebase parameters
String apiKey = WebConfigurationManager.AppSettings["Firebase_ApiKey"];
String authDomain = WebConfigurationManager.AppSettings["Firebase_AuthDomain"];
String dbURL = WebConfigurationManager.AppSettings["Firebase_DatabaseURL"];
String storage = WebConfigurationManager.AppSettings["Firebase_StorageBucket"];
// 組成 Url + QueryString
return String.Format("{0}?apiKey={1}&amp;amp;amp;authDomain={2}&amp;amp;amp;dbURL={3}&amp;amp;amp;storage={4}", src, apiKey, authDomain, dbURL, storage);
}
return base.Source;
}
}
#endregion
啲 indentation 好難搞!😂
重點係 protected override string Source,整好 AuthenticationSkin.WebAuth.html 條 Url,再將啲 Firebase Snippet 要嘅 parameters 砌成 QueryStrings 俾 JavaScript 還原 Firebase Snippet。
睇其中一個 method,SignInWithEmail:
 public void SignInWithEmail(String email, String password)
 {
   String script = String.Format("document.getElementById(\"TRG_{0}\").contentWindow.signInWithEmail(\"VWG_{1}\", \"{2}\", \"{3}\");", this.ID.ToString(), this.ID.ToString(), email, password);
   VWGClientContext.Current.Invoke(this, "eval", script);
 }
冇咩技巧,直接 invoke client side 嘅 AuthenticationSkin.WebAuth.js 入面嘅 JS function,個 JS function run 完會 fire 個 callback event,我哋 server side 去 FireEvent 接收:
 protected override void FireEvent(IEvent objEvent)
 {
   _SignInOk = false;
   var arg = objEvent["Value"];
   dynamic json = JsonConvert.DeserializeObject(arg);

   switch (objEvent.Type)
   {
     case "initApp":
       break;
     case "IsSignedIn":
       _SignInOk = true;
       this.IsSignedIn(EventArgs.Empty);
       break;
     case "signOut":
       break;
     case "signInWithEmail":
       _SignInOk = true;
       DeserializeAuthResultWithEmail(json);
       this.SignInResult(EventArgs.Empty);
       break;
     case "signInWithGoogle":
       _SignInOk = true;
       DeserializeAuthResultWithGoogle(json);
       this.SignInResult(EventArgs.Empty);
       break;
     case "signInWithFacebook":
       _SignInOk = true;
       DeserializeAuthResultWithGoogle(json);
       this.SignInResult(EventArgs.Empty);
       break;
     case "signInFailed":
       this.SignInResult(EventArgs.Empty);
       break;
     default:
       base.FireEvent(objEvent);
       break;
   }
 }
根據 objEvent.Type 做嘢,所以每個 function 都有自己嘅 objEvent.Type,signInWithEmail 就會拆解隻 Json String,然後再 call SignInResult event 回到你隻 app,於是,你隻 app 就可以知道 logon user 嘅 Firebase auth data。
就係咁單簡,88 ! 😜